
Creating availability surveys
When acts view your availability survey, they see a list of available spots for every upcoming show in your production, by default.
Confirmed groups spots that share identical details into a single option—if you have two 10-minute open spots with the same fee and name, they'll appear as one choice in the survey.
To present multiple spots as separate options in your survey, make sure at least one of these is different for each spot:
Spot name — For example, "Open Spot (first half)" and "Open Spot (second half)"
Spot length — A 10-minute spot and a 15-minute spot will appear separately
Fee — Different fees create separate options
By default, new act spots are named "act"—if all your spots use this default name with the same length and fee, they'll collapse into one survey option. Assign distinct names or vary the length or fee if you want acts to choose between multiple spots.
Only show spots for a certain time period
If you want to create a survey that covers only the shows in a certain time period, you can do that with our start/end date filters in survey creation. This is useful if you only want to solicit availability for a limited season.
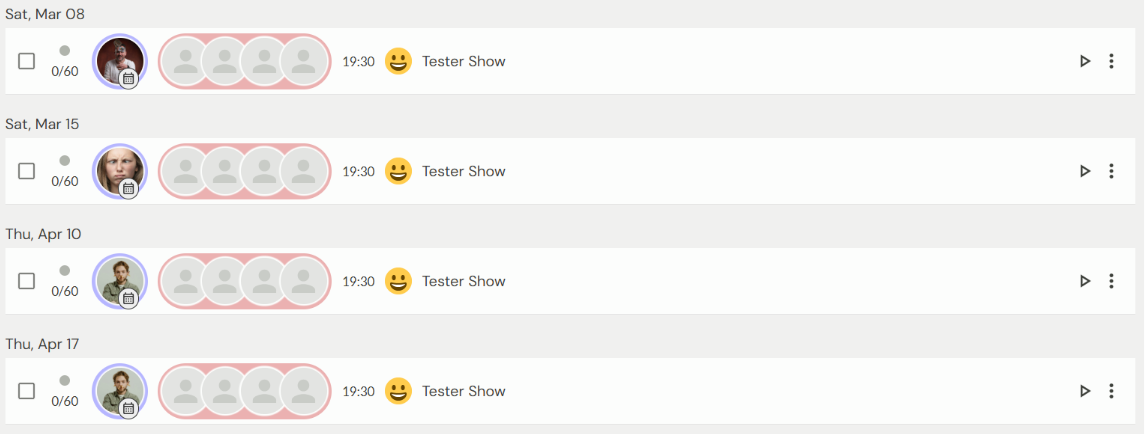
Here you can see that we have four Tester Shows schedules, two in March and two in April.
You only want to send out surveys for the April Tester Show shows.
Go to the ‘Surveys’ tab in the left sidebar.
Click the pink plus button to create a new survey.
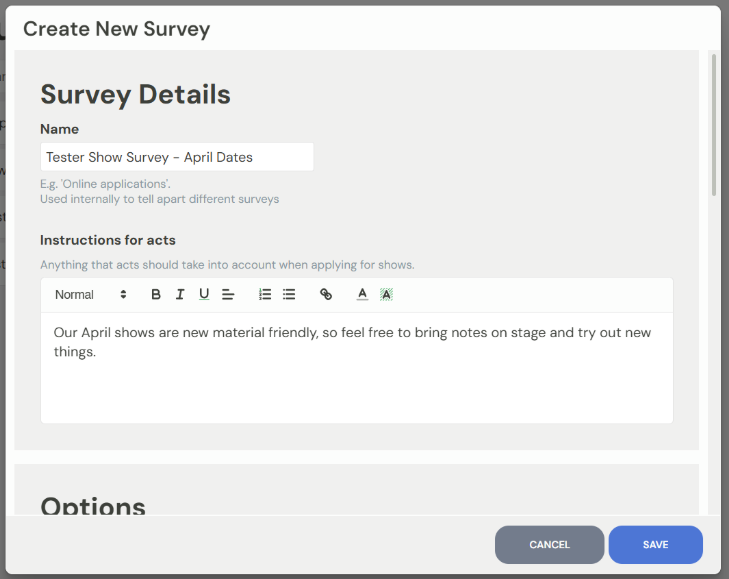
Name your survey in a way that makes it clear to you that it is only taking applications for the April dates.
Put in your instructions for your acts. Maybe this run of shows is different, and that’s why it needs its own survey. Make sure you put in any info your acts need.
Fill in the ‘options’ bit as you like, to your preferences.
Next you’ll arrive at ‘Filter Spots’ which is where you can specify this survey to be for a certain run of shows.
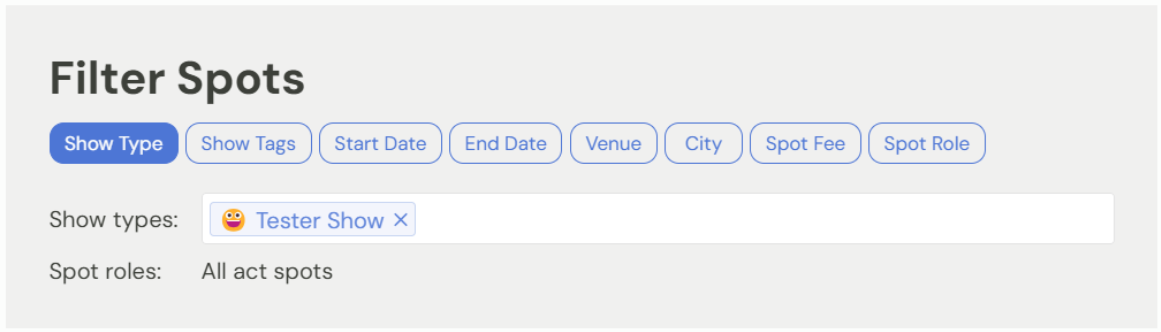
For show type, put in the correct show, then select ‘Start Date’ and enter the first of April, then 'End Date' and select the final day of April.
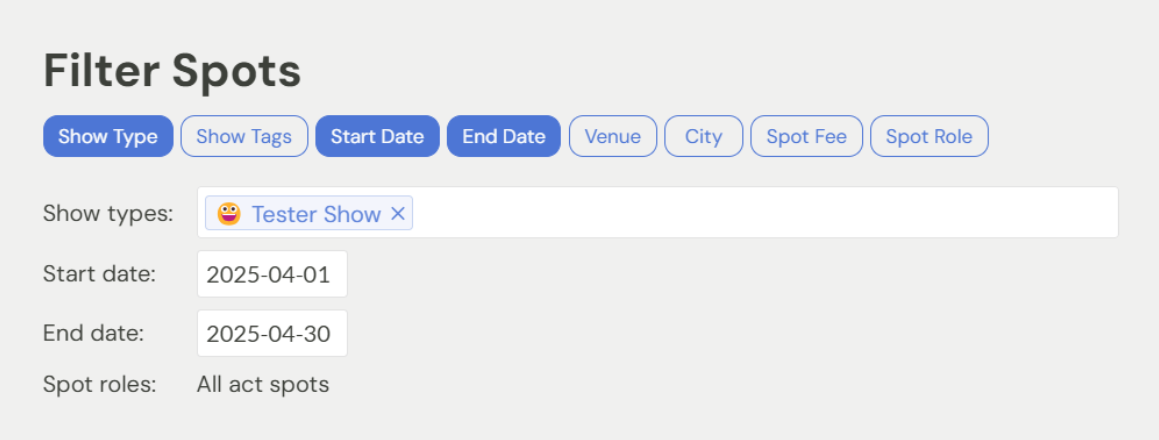
Fill the rest of the options to your preferences, then hit the blue ‘save’ button at the bottom.
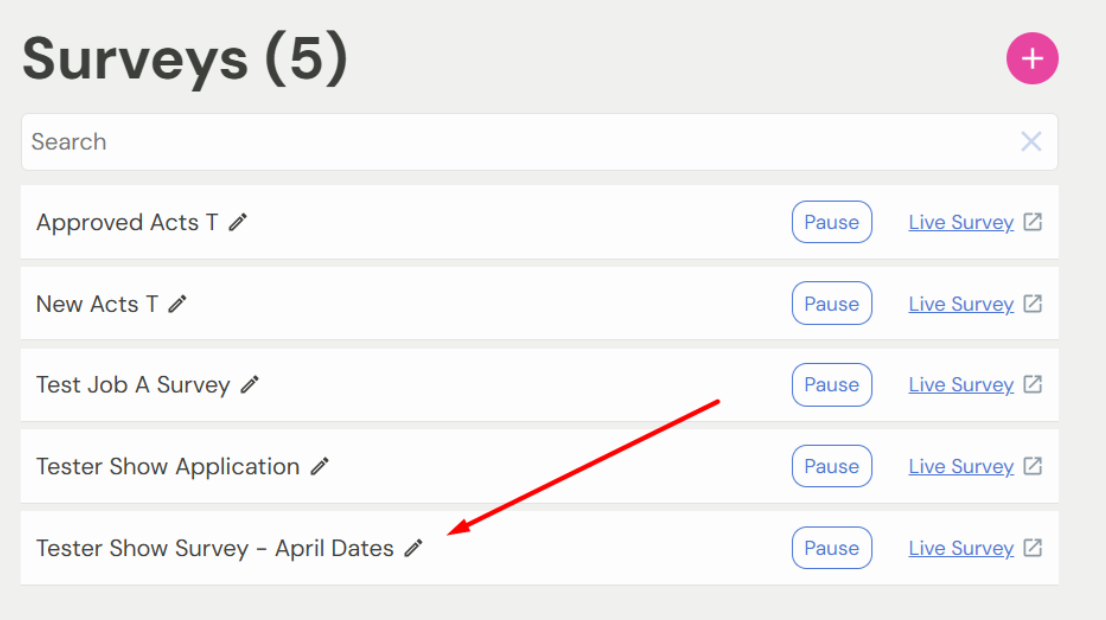
You’ll see that your new survey has appeared in your survey tab.
Click ‘live survey’ for your survey. It’ll take you to the live survey page.
You’ll see that only the shows for your chosen show format and time range appear on the survey.
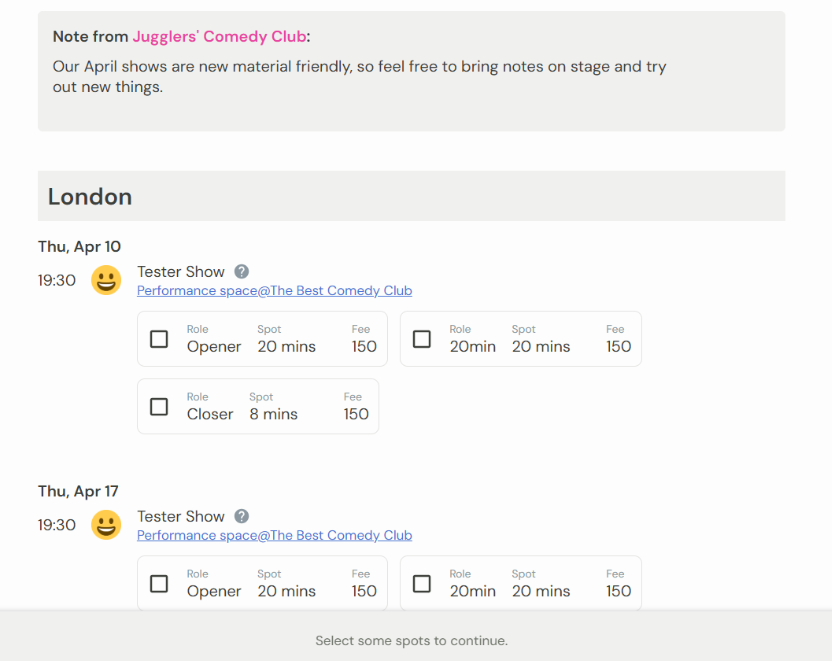
Share the URL of this page for acts to apply to your shows!
Restrict a survey by show type or show tags
Surveys by default include all available spots. You may wish to send a survey to a subsection of acts, like posting a link to your open mic spots on a public forum, or emailing a list of the high-paying spots to an agent.
The Filter Spots section in the survey editor controls which shows appear in the survey.
You can restrict by show type, show tags, venue, city, spot fee, and spot role.
Filter by show type shows only spots from shows whose type matches one you select.
In Surveys, click the edit survey pencil icon to the right of the survey.
In the Filter Spots section, turn on By Show Type.
In the Show types: field, select the show types to include.
A show appears in the survey when its type is one of the show types you selected.
Filter by show tags shows only spots from shows that carry every tag you select. You add tags to a show, then apply them as a survey filter.
Click any open spot on the show.
At the top, open Show — it defaults to Spots.
In the Tags: field, add a tag.
In Surveys, click the edit survey pencil icon to the right of the survey.
In the Filter Spots section, turn on By Show Tags.
In the Tags: field, select the tags to include.