
Your Website
Overview
You may like to save time by using the data you have in Confirmed to update your website automatically. This is possible using our static API.
This feature is limited to Pro accounts
This integration lets you pull show data—including custom fields, cover images, and show details—into any website that can fetch JSON data. This integration requires coding knowledge to implement on your website, but works with any static site or web framework.
What You Can Do
With the Your Website integration, you can:
Show upcoming events – Display a calendar or list of your scheduled shows
Feature show details – Include descriptions, cover images, and venue information
List performers – Showcase acts, hosts, and lineups for each show type
Link to tickets – Add direct ticket purchase links for each show
Customize presentation – Add custom fields like pull quotes, thumbnail images, or promotional videos
Your data is stored on multi-zone Google Cloud Storage servers, so your website integration works even if Confirmed experiences downtime.
How It Works
The integration provides a public JSON API endpoint that updates whenever you publish changes in Confirmed. The API is heavily cached on fast servers (located in Belgium) for quick page loads, and the cache automatically refreshes when you update your data.
Set Up Custom Fields
Before you can publish data to your website, define which information you want to make available.
Create Your Schema
Navigate to any show type in your left sidebar
Click the cog icon next to the show type name
Select the API tab
Click Edit Global Schema
Add Custom Fields
In the schema editor, you can add fields that will be available across all show types. Common fields include:
Text fields – Slug, title, short description, full description
Images – Cover image, thumbnail, square image
Videos – Hover videos, square videos
Structured data – Tags, tickets, quotes
Overrides – City, venue, time, custom per-show details
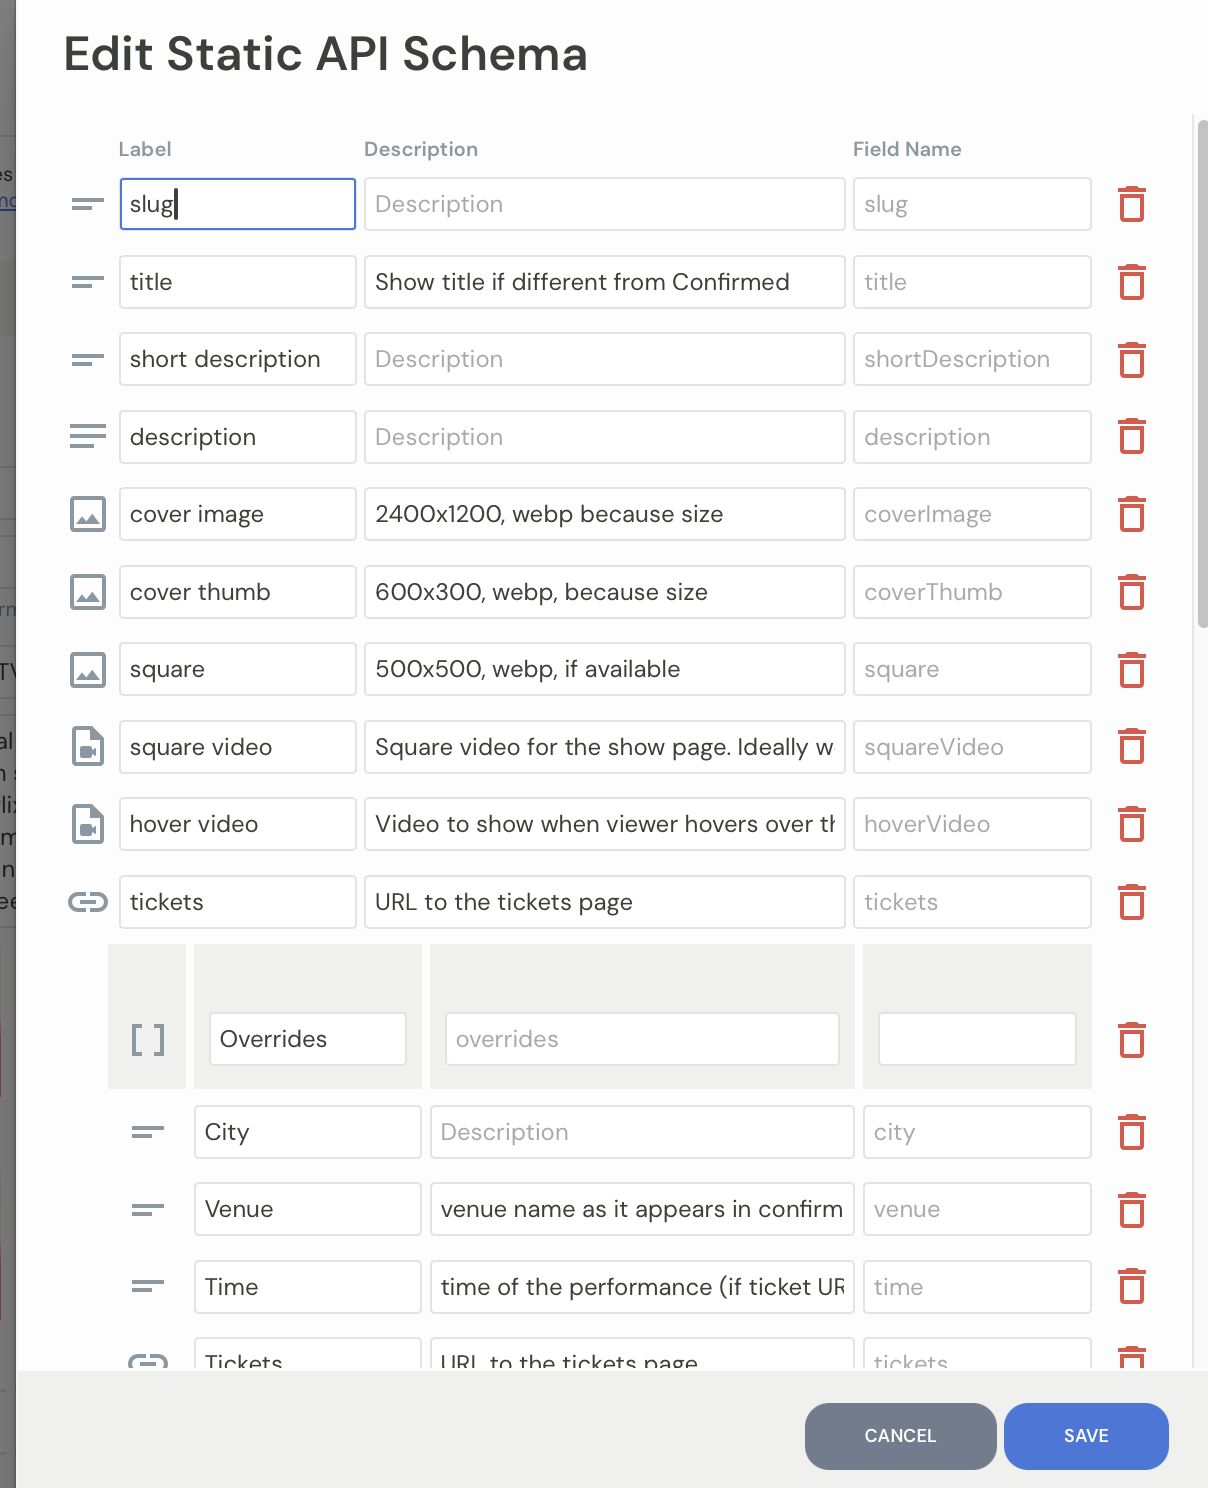
For each field, provide:
Label – Display name in the Confirmed interface
Description – Help text for your team
Field name – The key that appears in your JSON output
Use clear field names that match your website code conventions. For example, "coverImage" is easier to work with than "img1".
Click Save when you're finished defining your schema.
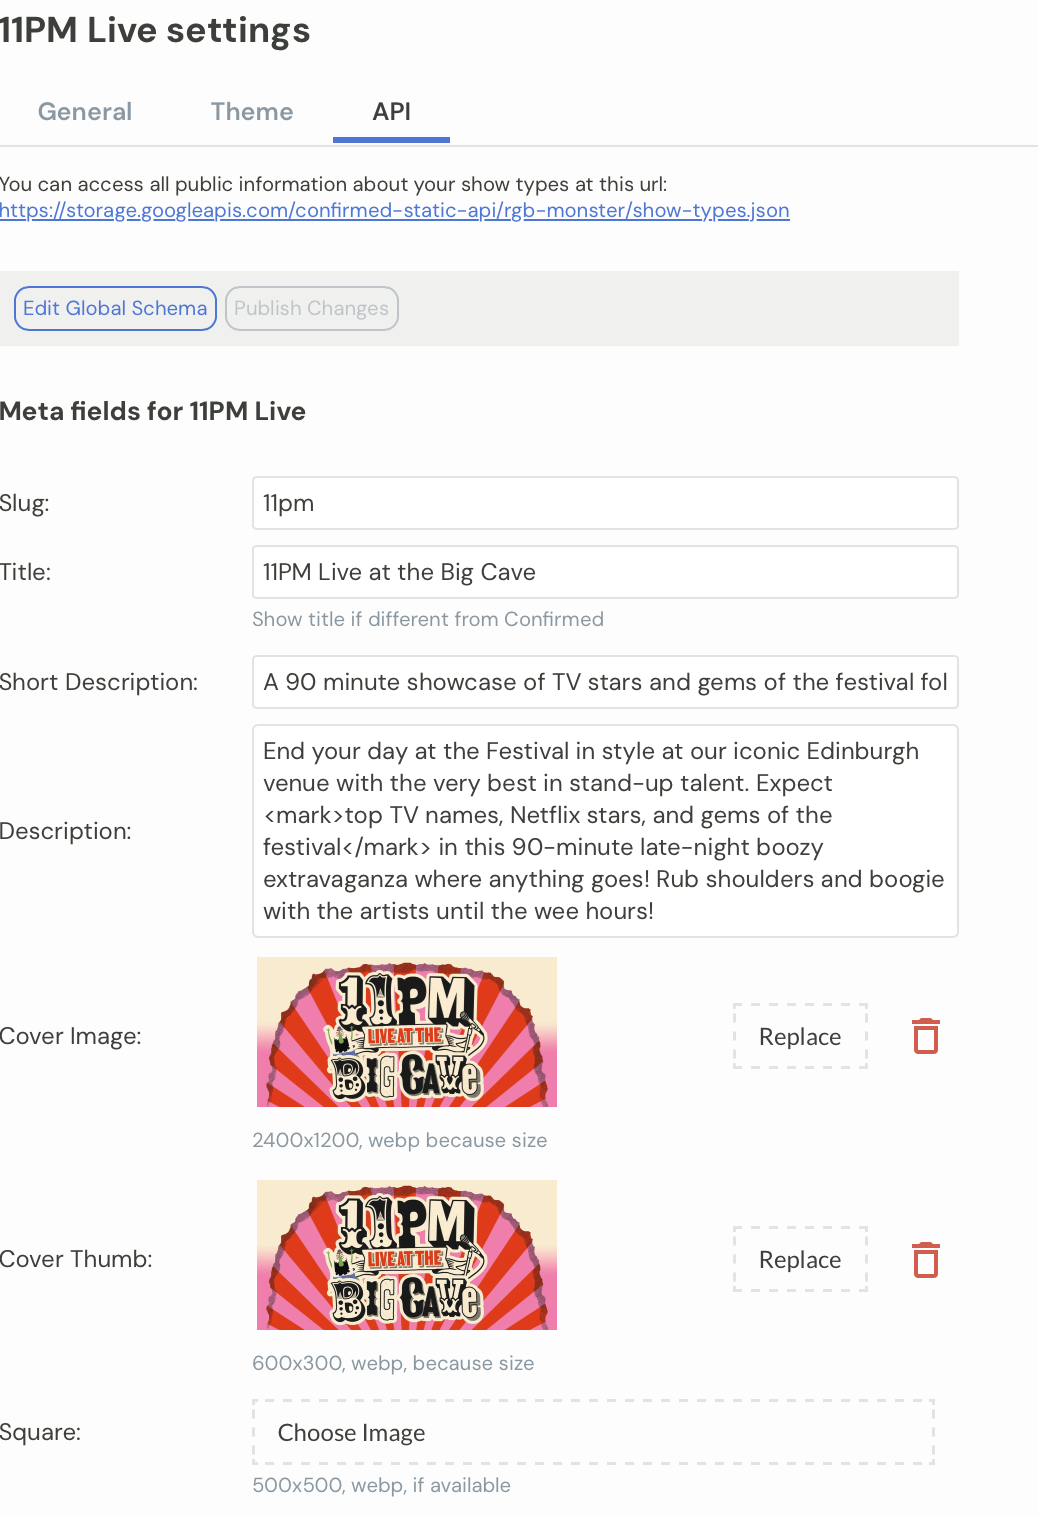
Add Data to Show Types
Once your schema is set up, fill in the custom fields for each show type.
Click the cog icon next to any show type
Select the API tab
Fill in your custom fields
Upload images where needed (webp format recommended)
Repeat for each show type you want to display on your website
Publish Your Changes
After adding or updating data, you need to push it to the API.
Go to the API tab for any show type
Click Publish Changes
Your data is now available at your public API endpoint
Changes won't appear on your website until you click Publish Changes. This gives you time to prepare updates before making them public.
Access Your API Endpoint
Your API URL is displayed in the API tab for any show type. It follows this format:
https://storage.googleapis.com/confirmed-static-api/{your-slug}/show-types.jsonThis endpoint returns an array of all your show types with their custom field data.
Example API Response
Here's what the JSON structure looks like:
[
  {
    "id": "show-type-id",
    "name": "Show Name",
    "archived": false,
    "description": "Internal description",
    "duration": 120,
    "meta": {
      "slug": "show-slug",
      "title": "Public Show Title",
      "shortDescription": "Brief summary",
      "description": "Full description",
      "coverImage": "https://...",
      "coverThumb": "https://...",
      "square": "https://...",
      "tickets": "https://tickets.example.com",
      "tags": [
        {"tag": "comedy"},
        {"tag": "live"}
      ],
      "quotes": [],
      "overrides": []
    }
  }
]
Integrate with Your Website
A web developer will be able to take your API endpoint to fetch show data and display it on your site. The specifics depend on your website platform. We're happy to hear from your web developer if they have specific questions about integration.